Ultimate Sub Bread Recipe: Bake Delicious Hoagies at Home! 🥖🏡😋
1. Introduction
There’s nothing quite like a perfectly made sub sandwich, and it all starts with the bread. This sub sandwich bread recipe will guide you through creating bakery-quality sandwich roll recipe right in your own kitchen. Forget store-bought loaves; with this hoagie bread recipe, you’ll impress everyone with your homemade goodness. Whether you call it a sub, a hoagie, or a hero, the foundation is the same: delicious, sturdy bread. If you’re looking for other baked goods to complement your meal, you might enjoy our recipes for Hot Cross Buns for Easter or our general guide to delicious Hot Cross Buns.
Making your own hero bread recipe means you control the ingredients, ensuring a fresh and flavorful outcome every time. This recipe is designed to be easy to follow, even for novice bakers. Baking bread at home can seem intimidating, but this recipe breaks it down into manageable steps. Get ready to elevate your sandwich game with this ultimate sub bread recipe! And if you’re looking for something to fill your freshly-baked bread with, consider exploring our beef recipes for some filling ideas.
2. Why Make Your Own Sub Bread?
Baking your own sub sandwich bread recipe offers numerous benefits. Firstly, the taste is far superior to anything you can buy in a store. The texture is just right – soft on the inside with a slightly crispy crust, perfect for holding all your favorite fillings without getting soggy. Secondly, you know exactly what goes into your bread. No preservatives, artificial flavors, or unwanted additives. For those mindful of their diet or with specific dietary needs, this is a significant advantage. Knowing exactly what’s in your food can drastically improve meal satisfaction and overall health. Lastly, the aroma of freshly baked bread filling your home is simply irresistible! Imagine that warm, comforting scent as you create your own bakery at home. Plus, consider it a fun and rewarding project – perfect for a weekend activity!
If you are interested in more recipes, check out our soups!
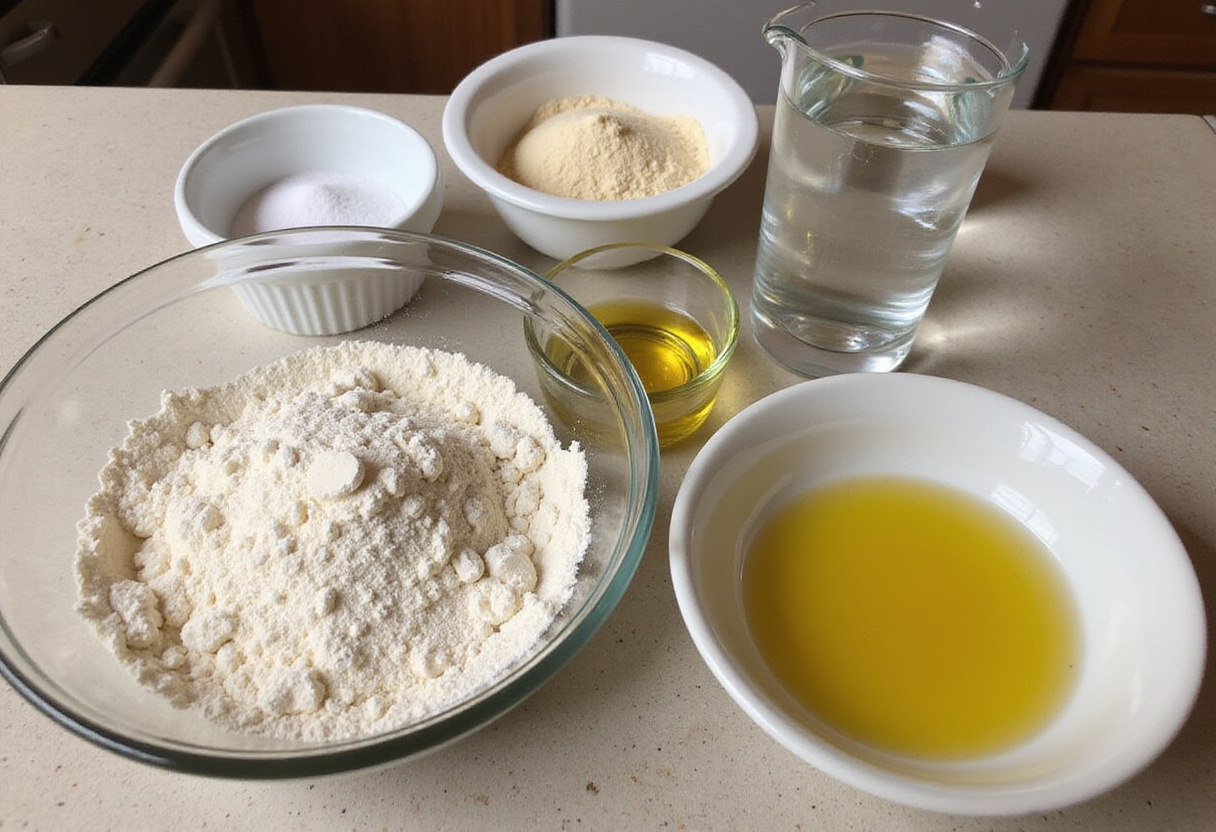
3. Essential Ingredients for the Best Sub Bread
To create the perfect hoagie bread recipe, you’ll need a few key ingredients. The quality of these ingredients will greatly influence the final product. These include:
All-purpose flour: Provides the structure for the bread. Using a good quality all-purpose flour makes a difference.
Active dry yeast: Essential for leavening, giving the bread its light and airy texture. Make sure your yeast isn’t expired!
Warm water: Activates the yeast. The right temperature is crucial.
Sugar: Feeds the yeast and adds a touch of sweetness. Just a little bit is needed.
Salt: Enhances the flavor and controls the yeast activity. Don’t skip the salt; it’s vital for taste and texture.
Olive oil: Adds moisture and richness to the dough. It also helps create a soft crust.
Having these ingredients ready ensures a smooth baking process and a delicious final product. Everything from the flour to the yeast plays a part in the bread’s overall texture and flavor. Adjusting the quantities slightly can help you achieve the perfect sandwich roll recipe to suit your taste. Feel free to experiment with different types of flour for unique flavors and textures.
4. Step-by-Step Guide to Making Sub Bread
Follow these detailed steps to bake your own delicious sub bread recipe:
Step 1: Activate the Yeast
In a small bowl, combine warm water (around 105-115°F) with sugar. Sprinkle the active dry yeast over the mixture and let it stand for 5-10 minutes until it becomes foamy. This indicates that the yeast is active and ready to use. If the yeast doesn’t foam, it might be expired, and you’ll need to start with fresh yeast. Accurate water temperature is key to this step.
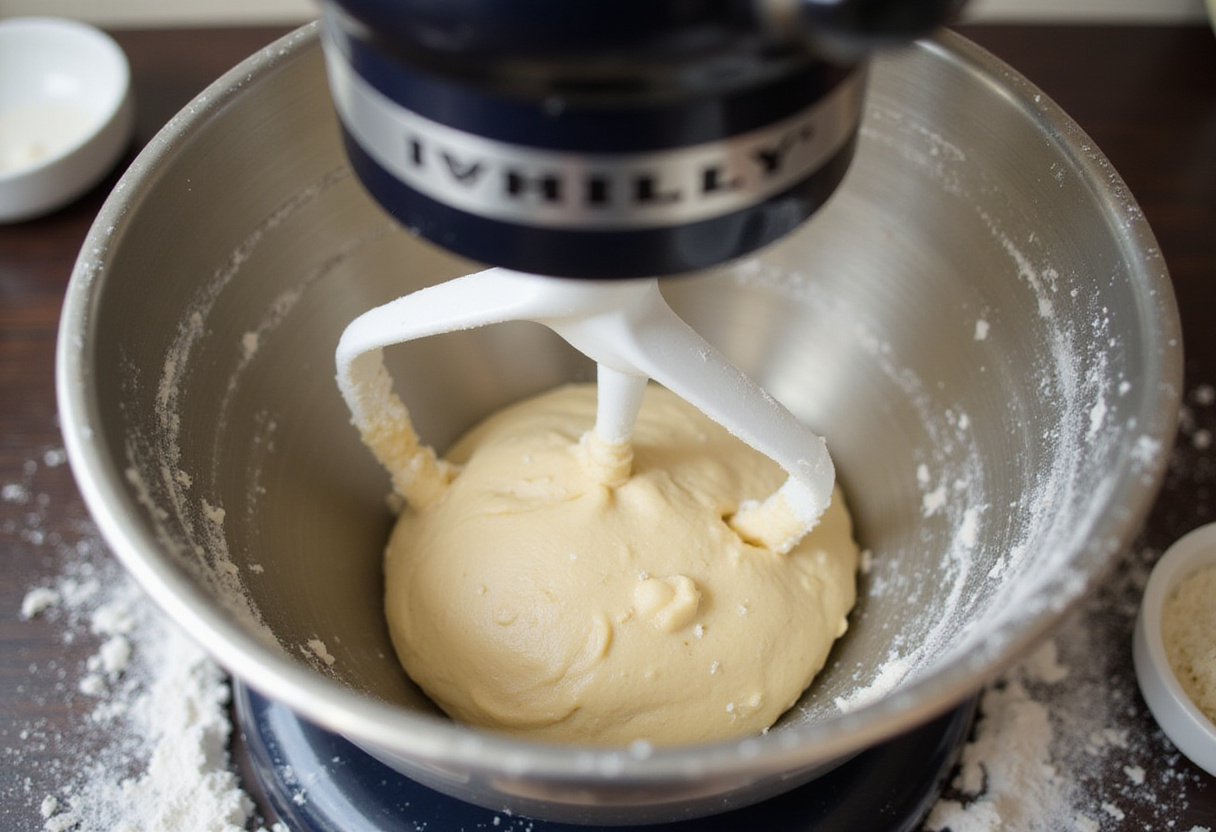
Step 2: Mix the Dough
In a large mixing bowl or the bowl of a stand mixer, combine the flour and salt. Add the yeast mixture and olive oil. If using a stand mixer, use the dough hook attachment to mix on low speed until a shaggy dough forms. If mixing by hand, stir until the dough comes together. Increase the speed to medium and knead for 5-7 minutes until the dough becomes smooth and elastic. The dough should be slightly tacky but not sticky. This kneading process develops the gluten, providing the bread’s structure. Be patient and ensure the dough is well-kneaded for the best results. If you enjoy Asian cuisine, you might also like our Korean Ground Beef Bowl recipe.
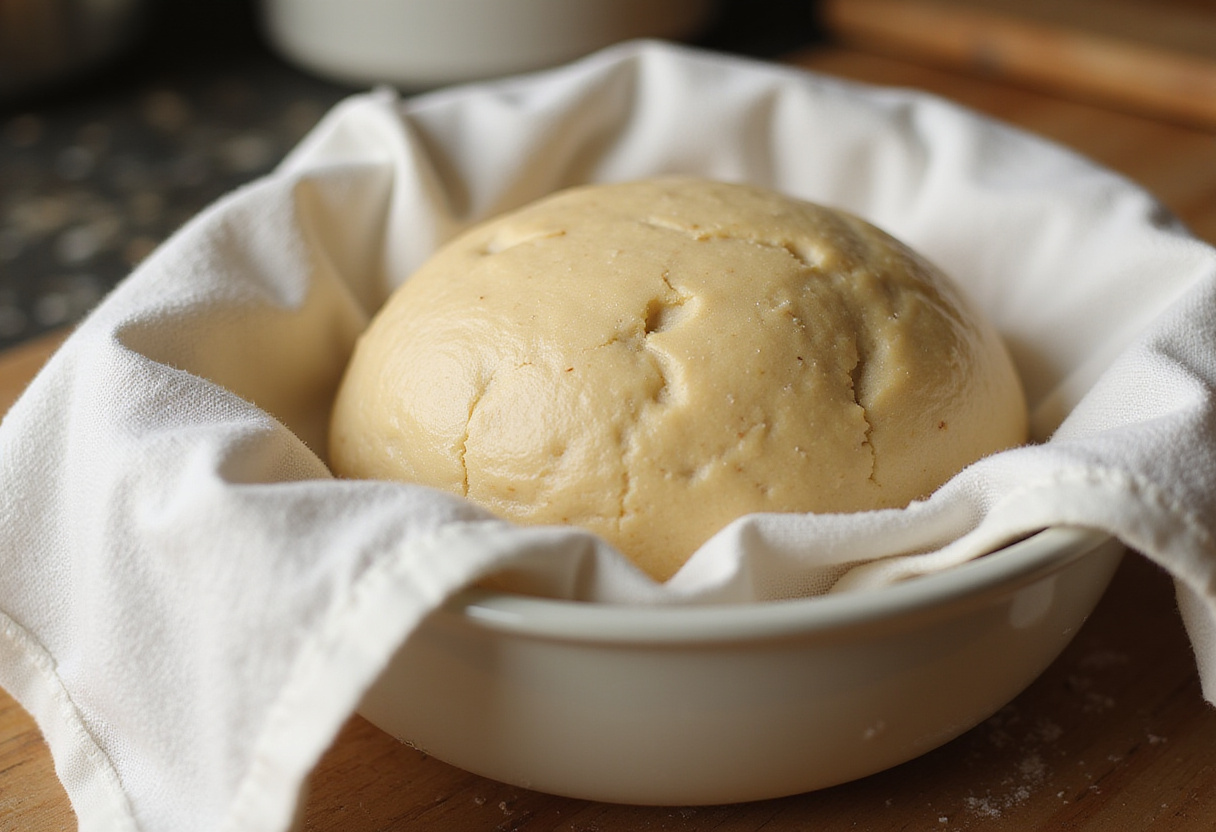
Step 3: Proof the Dough
Lightly grease a large bowl with olive oil. Place the dough in the bowl, turning to coat. Cover the bowl with plastic wrap or a clean kitchen towel and let it rise in a warm place for about 1-1.5 hours, or until the dough has doubled in size. This step is crucial for achieving a light and airy hero bread recipe. The warmer the environment, the faster the dough will rise. Ensure it is draft-free to maintain a consistent temperature. Proper proofing is essential for the final texture.
Step 4: Shape and Bake
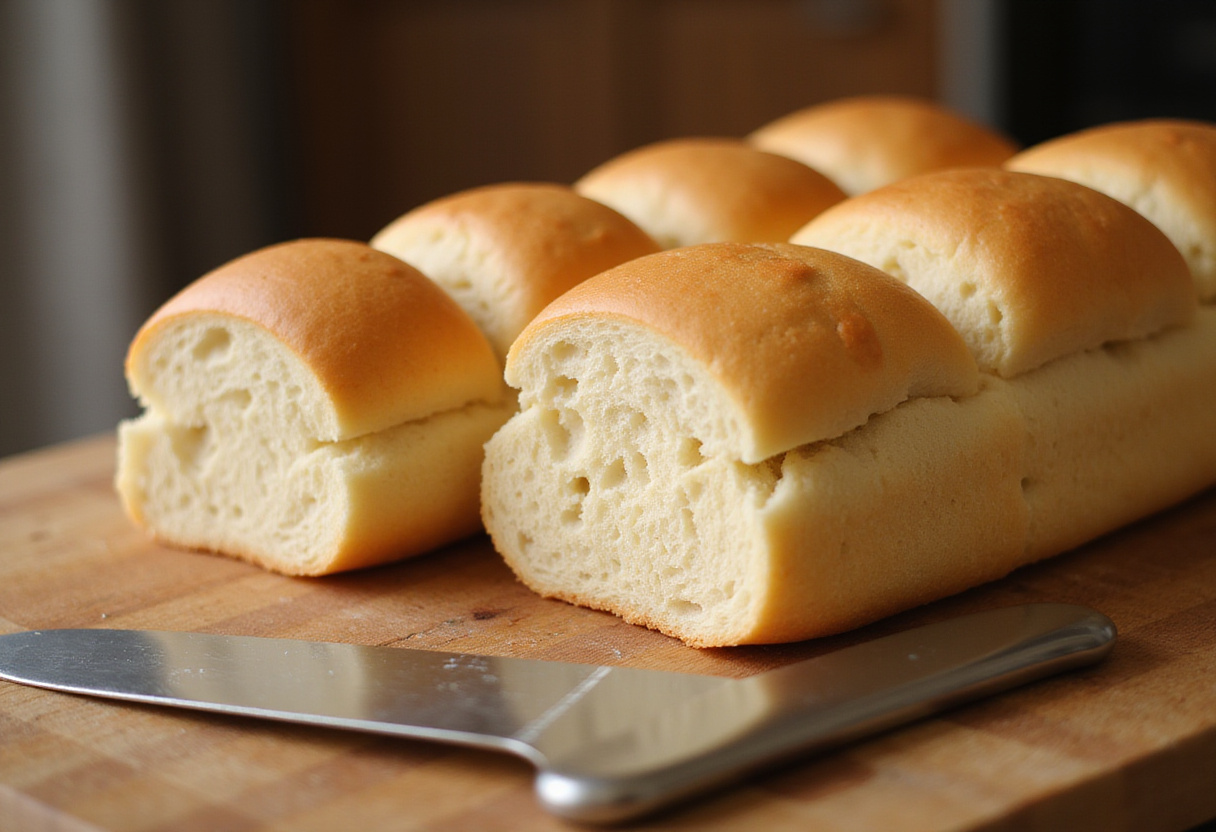
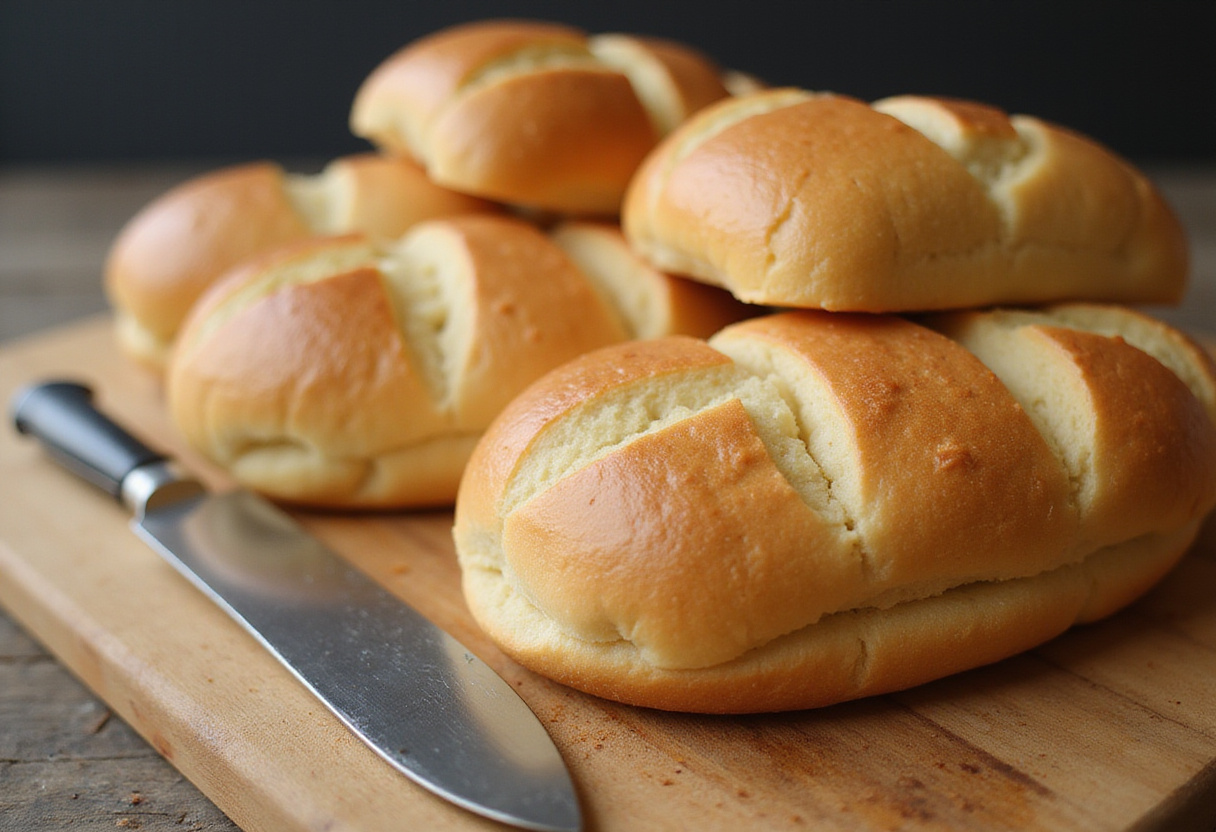
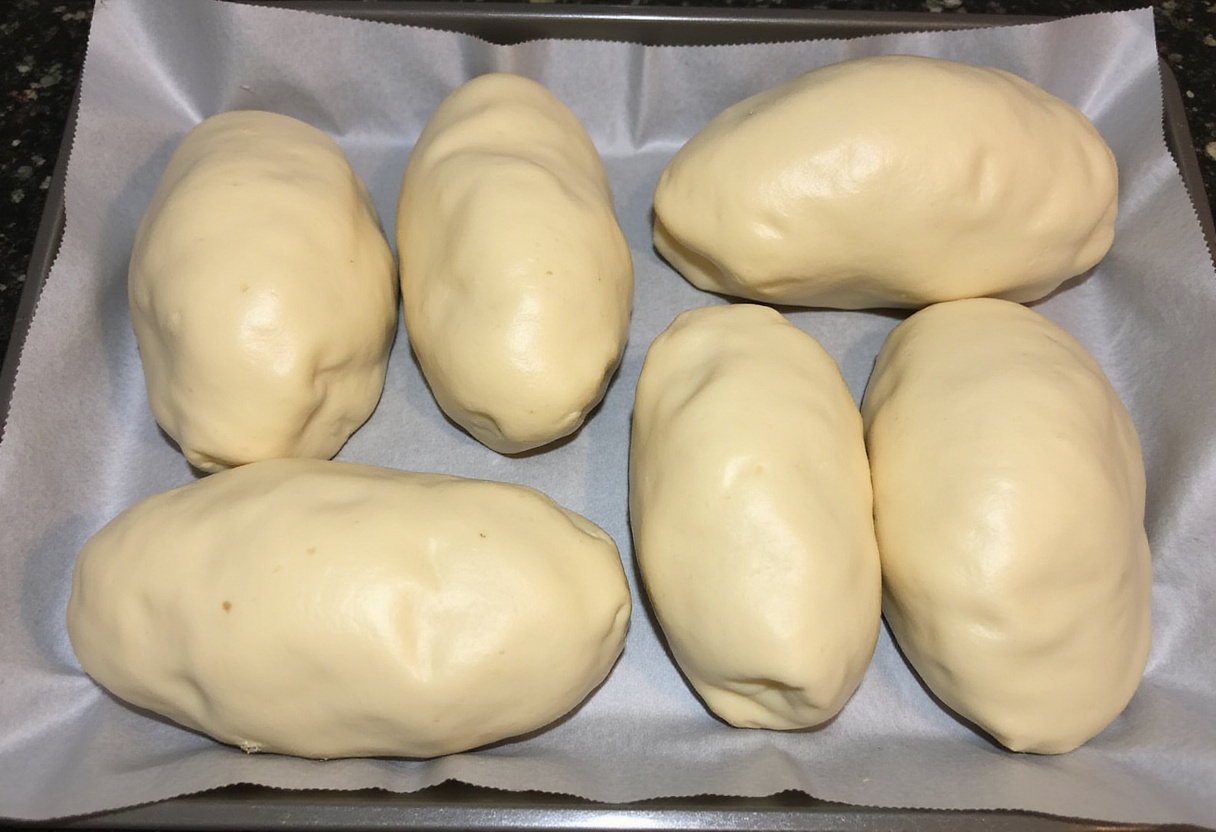
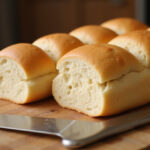
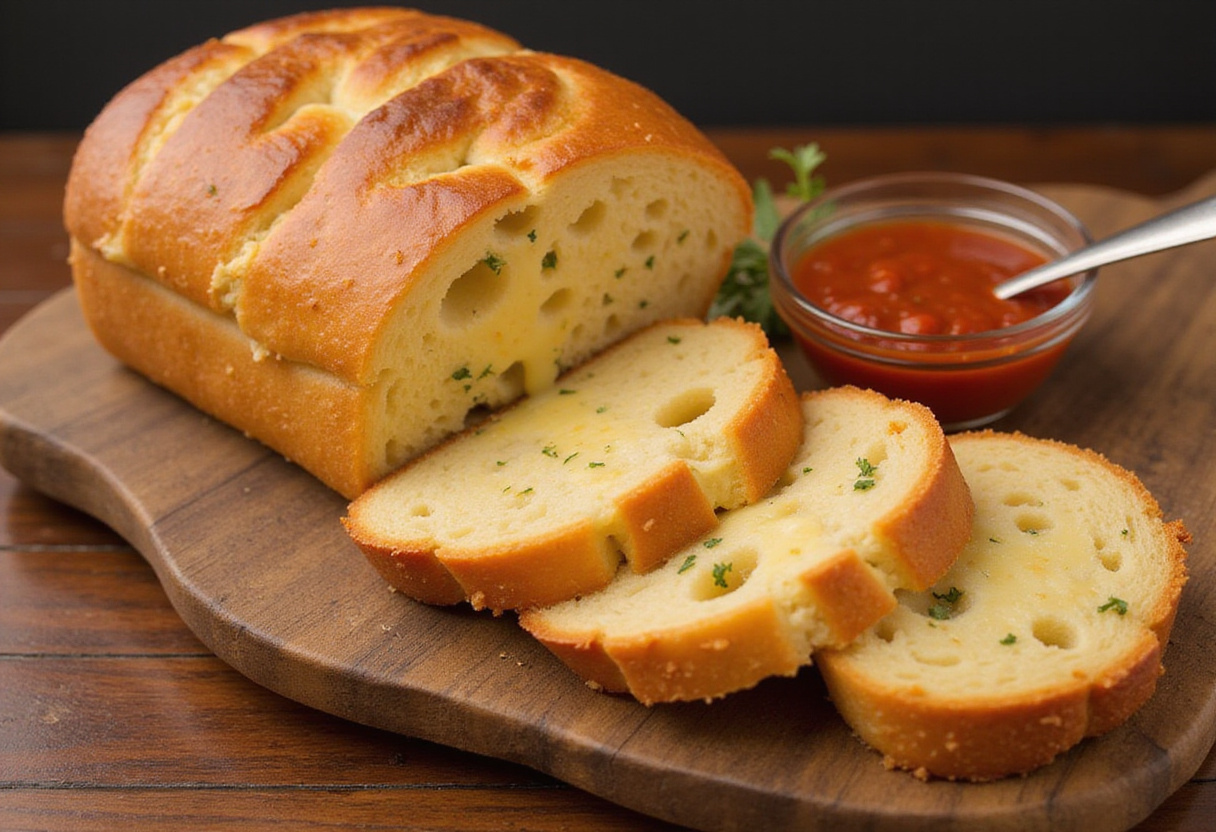
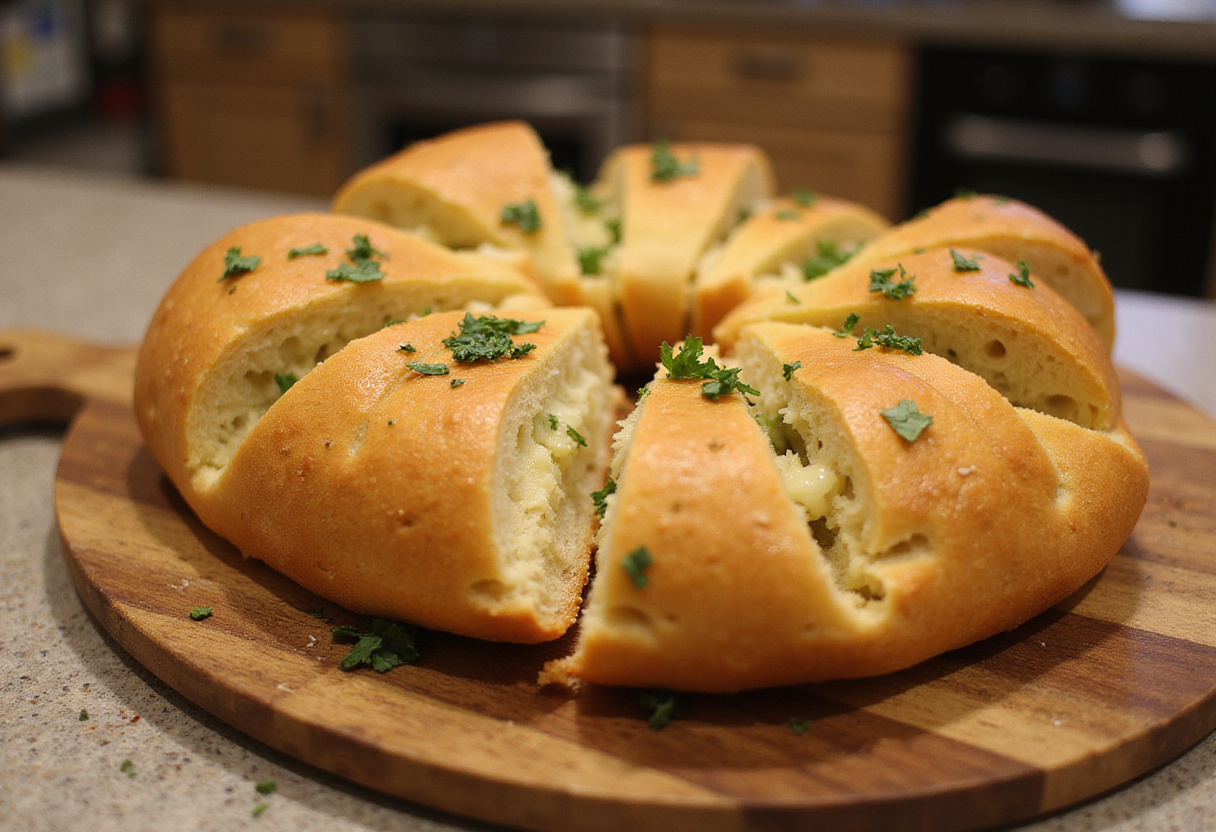
Preheat your oven to 375°F (190°C). Gently punch down the risen dough to release the air. Divide the dough into equal portions (usually 4-6) depending on the desired size of your sandwich roll recipe. Roll each portion into a long, cylindrical shape, tapering the ends slightly. Place the loaves on a baking sheet lined with parchment paper, ensuring they are spaced apart. Cover loosely with plastic wrap and let them rise for another 30 minutes. This second rise helps create a lighter crumb. Before baking, brush the tops of the loaves with olive oil or an egg wash for a golden crust. Bake for 20-25 minutes, or until the loaves are golden brown and sound hollow when tapped on the bottom. Rotate the baking sheet halfway through for even baking. Let them cool on a wire rack before slicing and filling. Cooling completely prevents a gummy texture.
5. Tips for Perfect Sub Bread
To ensure your sub sandwich bread recipe turns out perfectly every time, consider these tips:
Use a kitchen thermometer to check the water temperature for activating the yeast. Too hot, and it will kill the yeast; too cold, and it won’t activate. This is one of the most important steps.
Don’t skip the kneading process. Proper kneading develops the gluten, which gives the bread its structure. Under-kneading results in a dense loaf.
Proof the dough in a warm, draft-free environment for optimal rising. A slightly warm oven or a sunny spot works wonders.
For a crispier crust, you can create steam in the oven by placing a pan of hot water on the bottom rack during baking. Be careful when adding and removing the hot water.
Once you master the basic hoagie bread recipe, feel free to experiment with variations. Add herbs like rosemary or thyme to the dough for an aromatic twist. You might consider adding these herbs during the kneading process for even distribution. Incorporate cheese or garlic for added flavor. Roasted garlic adds a rich, savory element. You can also use different types of flour, such as whole wheat, for a heartier bread. Whole wheat flour will change the texture slightly. Get creative and make the sub bread recipe your own! Customization can lead to some truly unique and delicious creations. Also, feel free to browse our breakfast section.
7. Serving Suggestions
The possibilities are endless when it comes to serving your homemade hero bread recipe. Use it to create classic subs with cold cuts, cheeses, and your favorite toppings. Consider layering your ingredients thoughtfully for the best flavor distribution. Grill the bread and make panini-style sandwiches. Grilling adds a smoky flavor and a crispy texture. It’s also perfect for meatball subs, cheesesteaks, or even garlic bread. The superior quality of your homemade bread will elevate any sandwich you create. Don’t be afraid to experiment with different fillings and flavor combinations.
8. Storing Your Homemade Sub Bread
To keep your sub bread recipe creations fresh, store them properly. Once cooled, wrap the loaves tightly in plastic wrap or place them in an airtight container. Proper storage is crucial for maintaining freshness. They can be stored at room temperature for 2-3 days or in the refrigerator for up to a week. Refrigeration will help prolong its shelf life. For longer storage, you can freeze the loaves. Wrap them tightly in plastic wrap and then in foil, and they will keep for up to 2-3 months. Thaw completely before using. Thawing slowly at room temperature is recommended.
9. Conclusion
Making your own sub sandwich bread recipe is a rewarding experience that elevates your sandwich-making to a whole new level. With a few simple ingredients and steps, you can bake delicious, bakery-quality sandwich roll recipe right at home. This hoagie bread recipe is not only easy but also allows you to customize the flavors to your liking. So, grab your ingredients and start baking your perfect hero bread recipe today! If you have more questions regarding our content, you can check about us page.
Bake delicious hoagies at home with this ultimate sub bread recipe! This guide will help you create bakery-quality sandwich rolls perfect for any sub, hoagie, or hero. Enjoy fresh, preservative-free bread with a soft inside and crispy crust.
Ingredients
All-purpose flour: 3 cups
Active dry yeast: 2 1/4 teaspoons (1 packet)
Warm water: 1 1/4 cups (105-115°F)
Sugar: 1 tablespoon
Salt: 1 1/2 teaspoons
Olive oil: 2 tablespoons
Instructions
Activate the Yeast: In a small bowl, combine warm water and sugar. Sprinkle yeast over the mixture and let stand for 5-10 minutes until foamy.
Mix the Dough: In a large bowl or stand mixer, combine flour and salt. Add yeast mixture and olive oil. Knead until a smooth, elastic dough forms (5-7 minutes).
Proof the Dough: Grease a large bowl, place dough in bowl, turning to coat. Cover and let rise in a warm place for 1-1.5 hours, or until doubled in size.
Shape and Bake: Preheat oven to 375°F (190°C). Punch down dough, divide into 4-6 portions, and roll into cylindrical shapes. Place on a baking sheet lined with parchment paper, cover, and let rise for 30 minutes. Brush with olive oil or egg wash. Bake for 20-25 minutes, until golden brown and hollow when tapped.
Cool: Let cool on a wire rack before slicing and serving.
Notes
Use a kitchen thermometer to ensure the water is at the correct temperature for activating the yeast (105-115°F).
Proper kneading is essential for developing the gluten, which gives the bread its structure.
For a crispier crust, create steam in the oven by placing a pan of hot water on the bottom rack during baking.
Experiment with adding herbs like rosemary or thyme for an aromatic twist.
Prep Time:20 minutes
Cook Time:25 minutes
Category:Bread
Method:Baking
Cuisine:American
Nutrition
Serving Size:1 loaf
Calories:250 Kcal
Sugar:3g
Sodium:350mg
Fat:5g
Saturated Fat:0.7g
Unsaturated Fat:3.5g
Trans Fat:0g
Carbohydrates:45g
Fiber:2g
Protein:7g
Cholesterol:0mg
Hi There!
Welcome to RecipesAlways.com! I’m Chef Megan, and I’m so excited to have you here as we embark on this flavorful journey together.