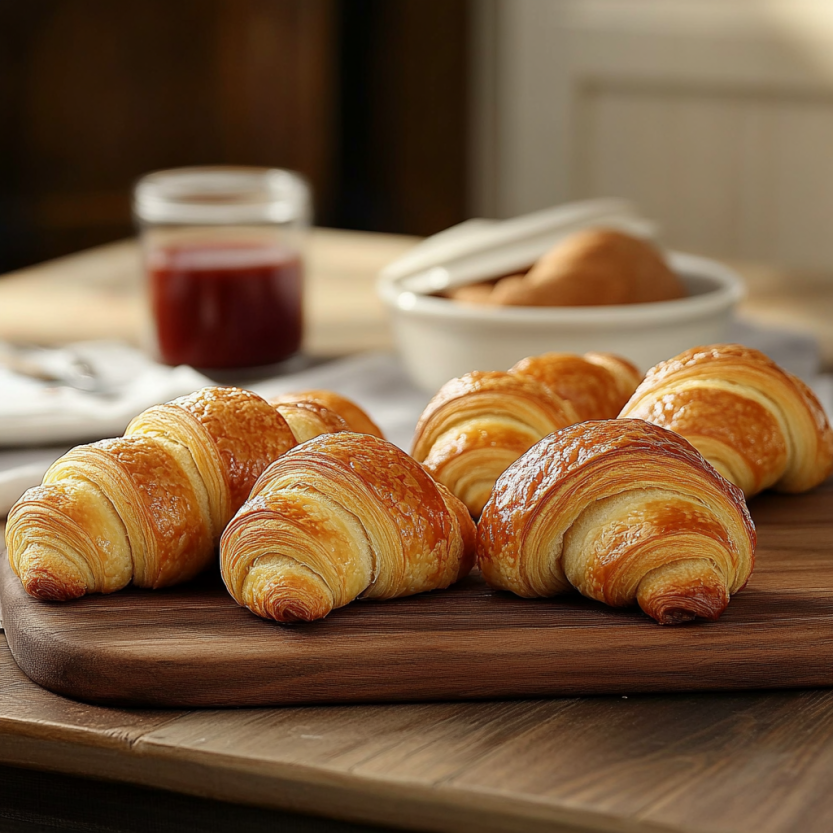
Homemade Flaky Croissants: A Buttery, Flaky Delight 🥐✨
1. Introduction – Mastering the Art of Homemade Flaky Croissants
Creating homemade flaky croissants is an art that combines patience, skill, and a profound love for baking. These golden, buttery pastries are more than just breakfast; they’re an experience. Perfect for a leisurely breakfast, a sophisticated brunch, or an indulgent afternoon treat, freshly baked croissants will undoubtedly impress your family and friends. Imagine serving warm, homemade flaky croissants on a weekend morning – a true testament to your baking prowess. This detailed, easy-to-follow guide will meticulously walk you through each step of the process, ensuring you achieve bakery-quality results right from the comfort of your own kitchen. Forget store-bought imitations! Let’s embark on this delightful journey to craft your very own remarkable homemade flaky croissants!
2. Ingredients – The Building Blocks of Buttery Perfection
Quality ingredients are paramount when aiming for the quintessential flaky croissant. Ensure all your ingredients are as fresh as possible for optimal results. Here’s what you’ll need:
1 ½ cups (3 sticks) cold unsalted butter, the cornerstone of our flaky layers. We suggest using unsalted butter for perfect control of the croissant’s final taste.
1 cup ice-cold water
1 tablespoon active dry yeast
1 large egg (for the perfect golden egg wash)
3. Instructions – A Step-by-Step Guide to Flaky Bliss
Step 1: Mixing the Dough – Laying the Foundation
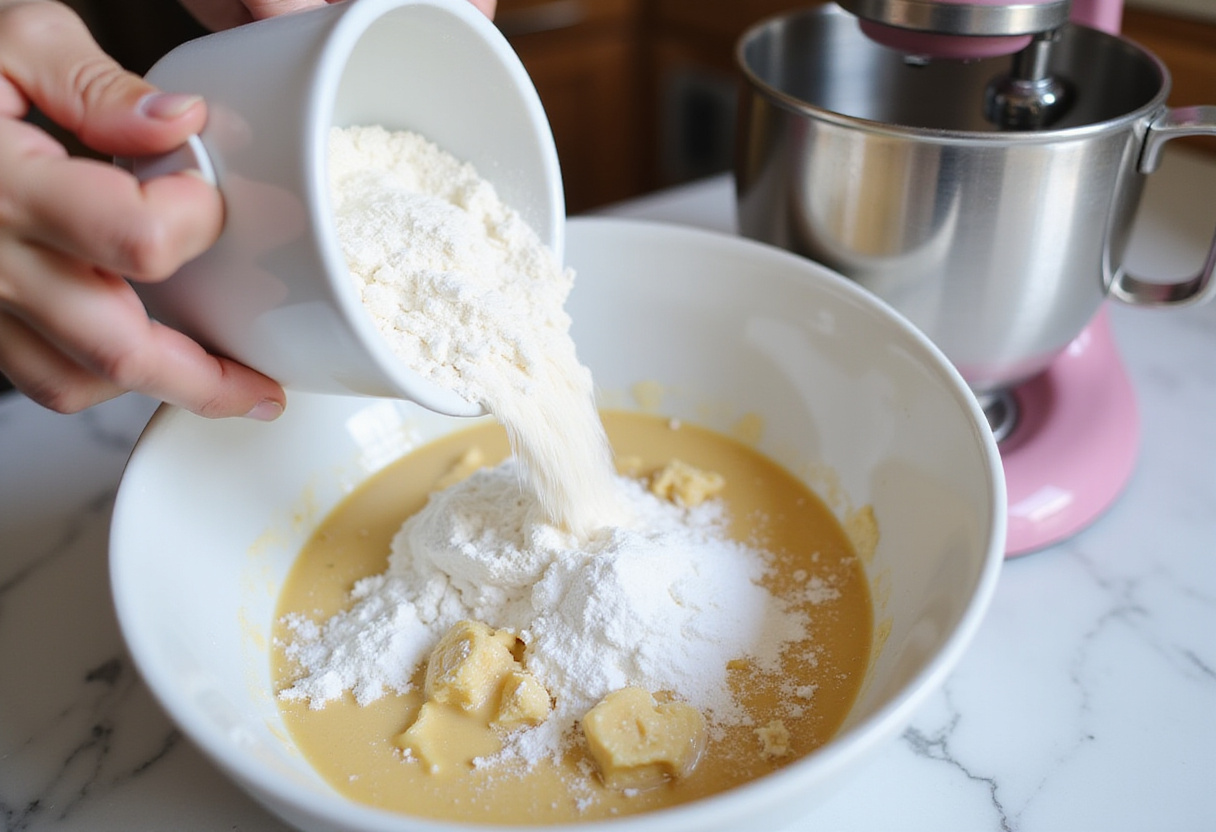
Begin by creating the dough. In a large mixing bowl, whisk together 4 cups of all-purpose flour, 1 tablespoon of sugar, and 1 teaspoon of salt. In a separate small bowl, dissolve 1 tablespoon of active dry yeast in 1 cup of ice-cold water. Allow it to rest for about 5-10 minutes until it becomes foamy – this indicates the yeast is active and ready to work its magic. Once foamy, add the yeast mixture to the dry flour mixture. Stir until the ingredients begin to come together, forming a shaggy dough. Turn the dough out onto a lightly floured surface and knead for about 5-7 minutes, until it forms a smooth, pliable ball. It’s important not to over-knead at this stage. Remember, good bread and pastries start with a well-made dough, much like with sourdough.
Step 2: Preparing the Butter Block – The Secret to Flaky Layers
This is arguably the most crucial step in achieving those coveted flaky layers in your homemade flaky croissants. Take 1 ½ cups (3 sticks) of *very* cold unsalted butter. Place the butter between two large sheets of parchment paper. Using a rolling pin, gently pound and roll the butter into a rectangle approximately ½ inch thick. The key here is to ensure the butter remains cold and doesn’t melt. If it starts to soften too much, return it to the refrigerator for a few minutes. A well-prepared butter block is essential for those beautiful, distinct layers.
Step 3: Lamination – Creating the Layers of Perfection
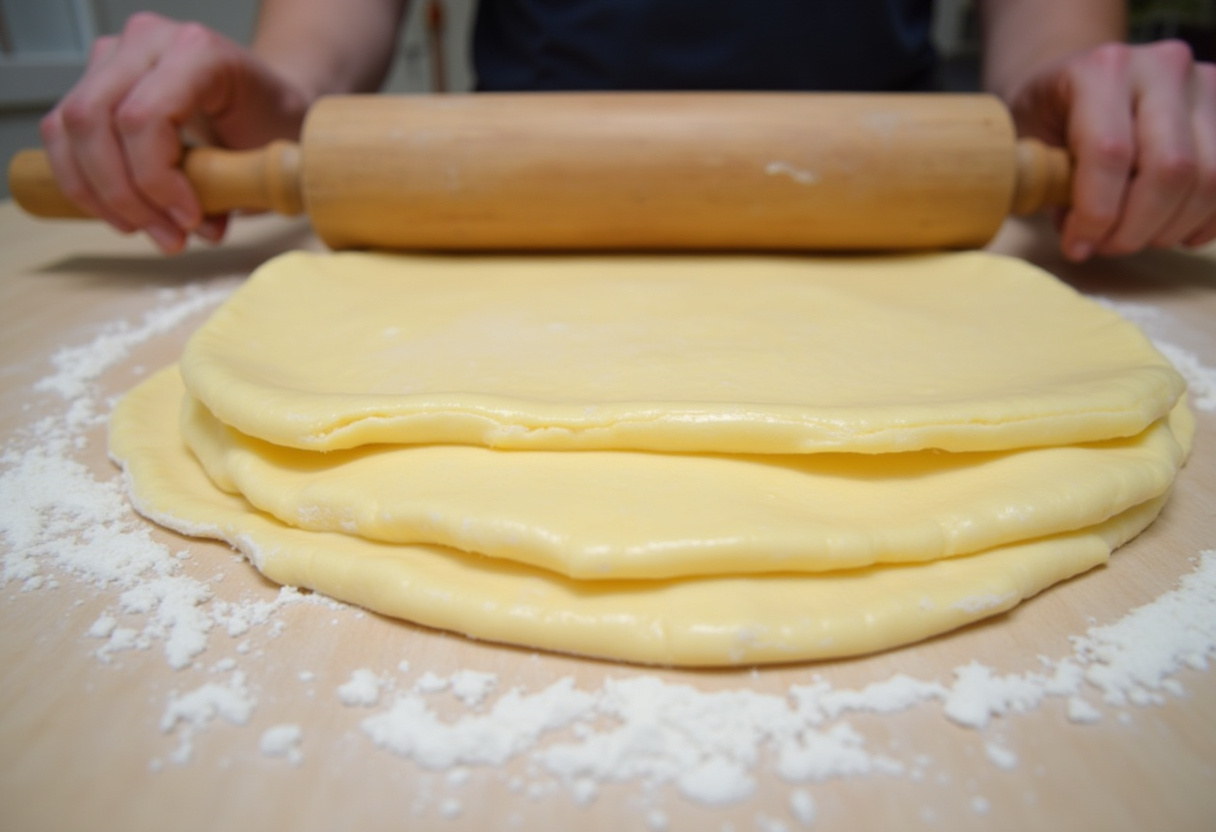
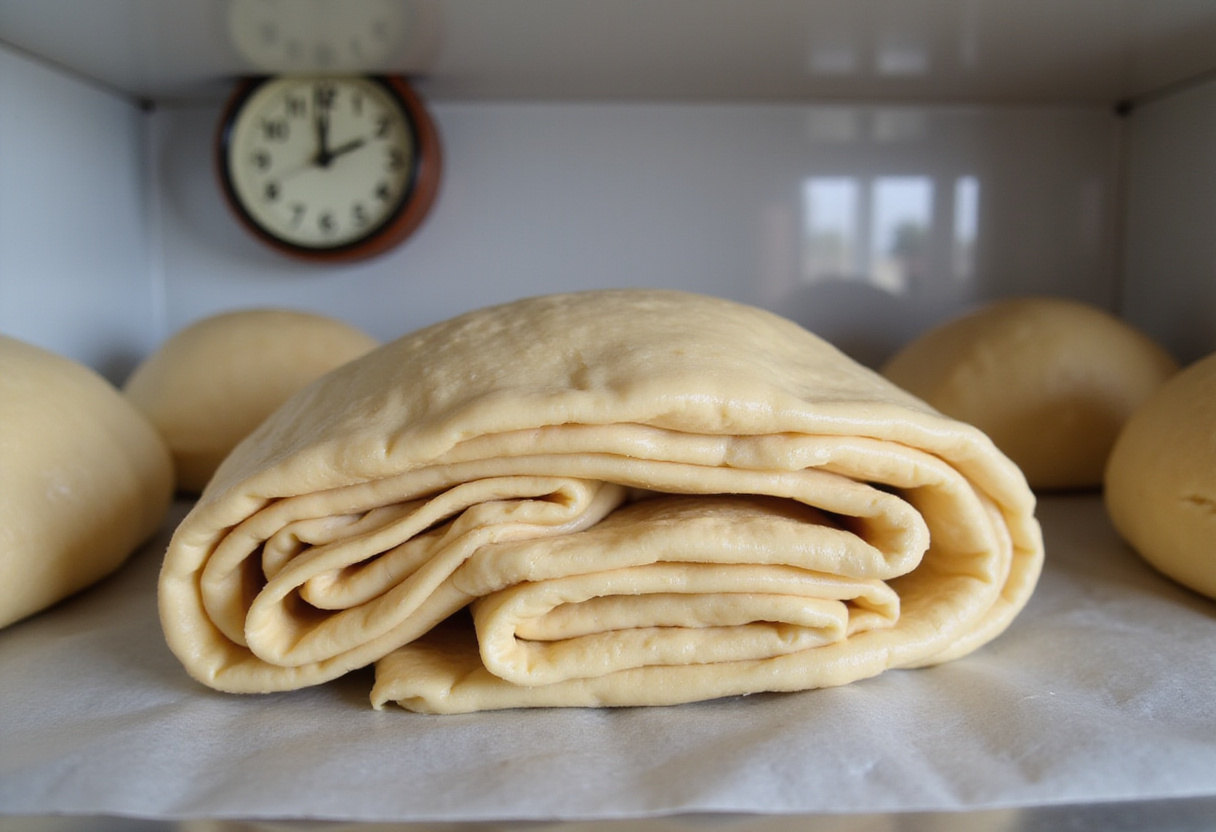
Now, it’s laminating time – the process of layering butter and dough to create the signature flakiness. On a lightly floured surface, roll out your dough into a large rectangle, approximately twice the size of your butter rectangle. Carefully place the prepared butter block in the center of the dough. Fold one side of the dough over the butter, and then fold the other side over, encasing the butter completely. Gently press down the edges to seal. Now, roll out the dough again into a long rectangle, being careful not to press too hard and squeeze out the butter. Fold the dough into thirds, like a letter. This is your first “turn”. Wrap the dough tightly in plastic wrap and chill in the refrigerator for at least 2 hours, or preferably overnight. Repeat this rolling, folding, and chilling process (the “turns”) 3-4 times for optimal flakiness. This chilling step is absolutely crucial; it allows the gluten to relax and the butter to firm up, preventing it from melting into the dough during baking. If you’re a garlic cheese bread fan, you’ll know the importance of layering flavors! Check out this garlic cheese bread recipe to get some inspiration.
Step 4: Shaping the Croissants – From Dough to Delight
After the final chilling, remove the dough from the refrigerator. On a lightly floured surface, roll it out into a large rectangle, about ¼ inch thick. Using a sharp knife or pizza cutter, cut the dough into long triangles. The size of the triangles will determine the size of your finished croissants. Starting from the wide end of each triangle, gently roll it up towards the point, creating a croissant shape. Place the shaped croissants on a baking sheet lined with parchment paper, leaving some space between each one to allow for expansion during baking. Lightly curve the ends of each croissant to give them that classic crescent shape. Cover the baking sheet with plastic wrap and let the croissants proof (rise) in a warm place for about 1-2 hours, or until they have nearly doubled in size. This final proofing stage is essential for achieving a light and airy texture.
4. Baking the Croissants – Golden Brown Goodness
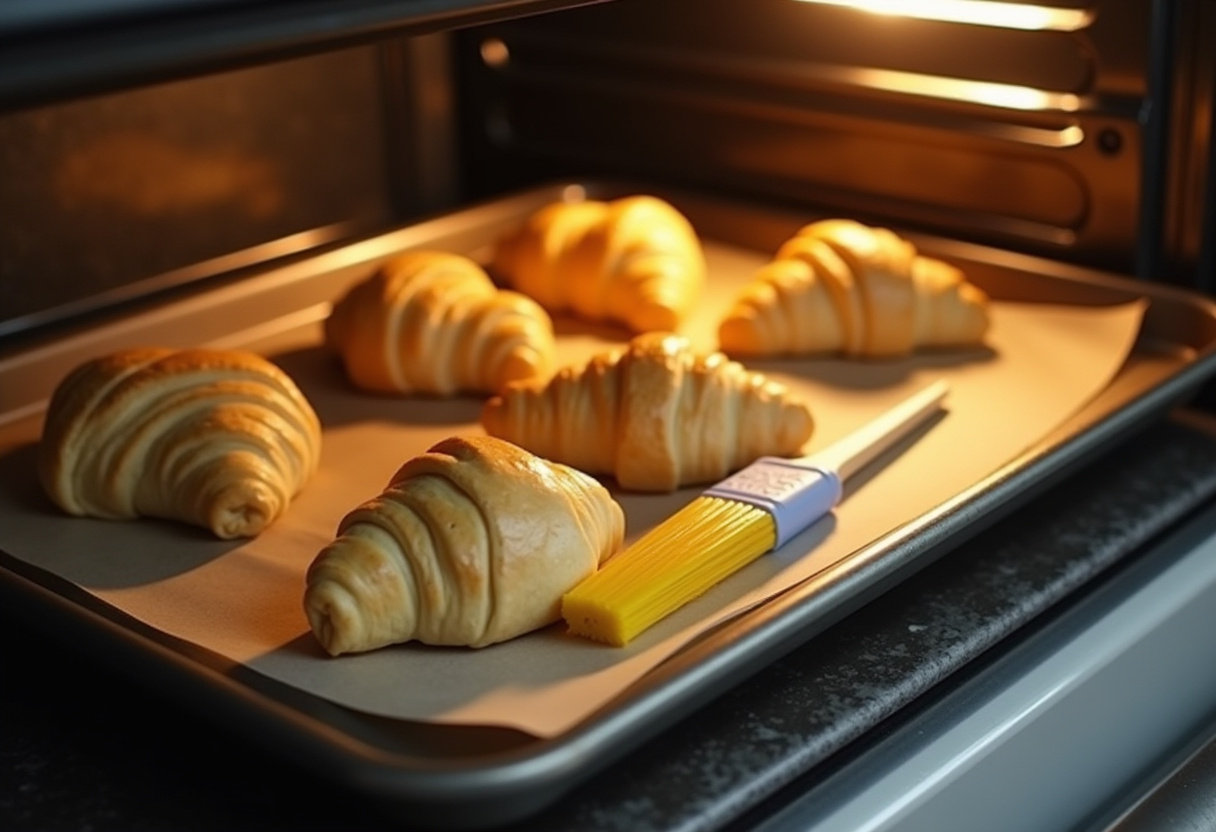
Preheat your oven to 400°F (200°C). In a small bowl, whisk together one large egg with a tablespoon of water to create an egg wash. Gently brush each proofed croissant with the egg wash, ensuring you cover all surfaces for a beautiful golden-brown finish. Bake your croissants in the preheated oven for about 20-25 minutes, or until they are deeply golden brown and cooked through. Keep a close eye on them during baking to prevent burning. The aroma of baking flaky croissants will fill your kitchen, signaling that deliciousness is imminent! For more delicious ideas, check out the breakfast recipes.
5. Storage Tips – Keeping the Flakiness Alive
To maintain the delightful quality of your homemade flaky croissants, proper storage is essential. For short-term storage, keep them in an airtight container at room temperature for up to 2 days. To prolong their shelf life, freeze them individually after baking. Once frozen solid, transfer them to a zip-lock bag for up to 2 months. To reheat, thaw them at room temperature and then warm them in a preheated oven at 350°F (175°C) for a few minutes until heated through and slightly crisp. This will restore their original flaky texture. Ensure proper cool down before storing to maintain the flakiness.
6. Serving Suggestions – Elevating the Croissant Experience
Serve your freshly baked croissants warm to truly appreciate their flaky texture and buttery flavor. They are heavenly on their own but even better with a generous smear of butter, your favorite jams, or a decadent chocolate spread. For a savory twist, consider filling them with almond paste, slices of cheese, or ham. Croissants also make fantastic sandwiches! Experiment with different fillings and toppings to create your own signature croissant creations. These are not just for breakfast, dinner can also be paired with it.
7. FAQs – Your Croissant Questions Answered
What type of flour is best for achieving those distinctive homemade croissants’ flaky layers?
All-purpose flour is generally the best choice for homemade flaky croissants. However, for an even lighter and more delicate texture, you can substitute some of the all-purpose flour with bread flour. Experiment with different ratios to find your preferred balance.
Can I prepare the dough in advance to streamline the baking process?
Absolutely! Preparing the dough a day in advance is a great way to break up the workload and allows the dough to develop even more flavor. Simply prepare the dough through the first few turns of lamination, then wrap it tightly in plastic wrap and store it in the refrigerator overnight. The next day, continue with the remaining turns and shaping. This method also works well with other similar pastry recipes.
What are some tips and tricks for achieving exceptionally flakier croissants every time?
The key to achieving supreme flakiness lies in keeping the butter *very* cold throughout the entire process. If the butter becomes too soft, it will melt into the dough and compromise the layers. Also, avoid overworking the dough during the rolling out process, as this can develop the gluten too much and result in a tough croissant. Handle the dough gently and give it plenty of time to rest and chill between turns. Additionally, ensure the lamination is done correctly to allow the butter to be evenly spread.
8. Tips for Success – Mastering the Art of Croissant Perfection
Patience and precision are your best allies when making homemade flaky croissants. Pay close attention to each step, and don’t rush the process. Remember that chilling the dough properly between turns is absolutely essential for achieving the best results. Practice makes perfect, so don’t be discouraged if your first batch isn’t flawless. With each attempt, you’ll refine your technique and get closer to croissant perfection. And most importantly, enjoy the baking adventure!
9. Conclusion – Savor the Sweet Taste of Success
Creating homemade flaky croissants from scratch is a rewarding culinary endeavor that culminates in the most delightful and visually appealing pastries. While it may seem daunting at first, with practice and patience, you’ll master the technique and be able to enjoy these irresistible treats anytime you desire. Share your creations with loved ones, and bask in their compliments—you’ve truly earned it! The joy of baking and sharing homemade croissants is an experience that can’t be beat. You can also browse our desserts category if you feel like doing something else.
Indulge in the buttery, flaky delight of homemade croissants. This detailed guide will help you achieve bakery-quality pastries from the comfort of your kitchen.
Ingredients
Scale
4 cups all-purpose flour
1 tablespoon sugar
1 teaspoon salt
1 ½ cups cold unsalted butter
1 cup cold water
1 tablespoon active dry yeast
1 egg (for egg wash)
Instructions
Mix the dry ingredients: flour, sugar, and salt in a bowl.
Dissolve the yeast in cold water; let it rest until foamy, then add to flour mix.
Prepare butter by rolling it between parchment paper into a rectangle.
Roll out dough, incorporate chilled butter, roll again and chill for 2 hours.
Shape the croissants by cutting dough into triangles and rolling them up.
Brush with egg wash and bake at 400°F (200°C) for 20-25 minutes until golden brown.
Notes
Keep the butter cold for better layering.
Store in an airtight container for up to 2 days or freeze individually.
Serve with butter, jams, or fillings like cheese or ham for added delight.
Prep Time:30 minutes
Cook Time:25 minutes
Category:Pastry
Method:Baking
Cuisine:French
Nutrition
Serving Size:1 croissant
Calories:280 Kcal
Sugar:1g
Sodium:180mg
Fat:18g
Saturated Fat:11g
Unsaturated Fat:4g
Trans Fat:0g
Carbohydrates:29g
Fiber:1g
Protein:4g
Cholesterol:40mg
Hi There!
Welcome to RecipesAlways.com! I’m Chef Megan, and I’m so excited to have you here as we embark on this flavorful journey together.